

funlovincriminal
-
Content Count
416 -
Joined
-
Last visited
-
Days Won
21
Content Type
Profiles
Media Demo
Forums
Gallery
Calendar
Store
Posts posted by funlovincriminal
-
-
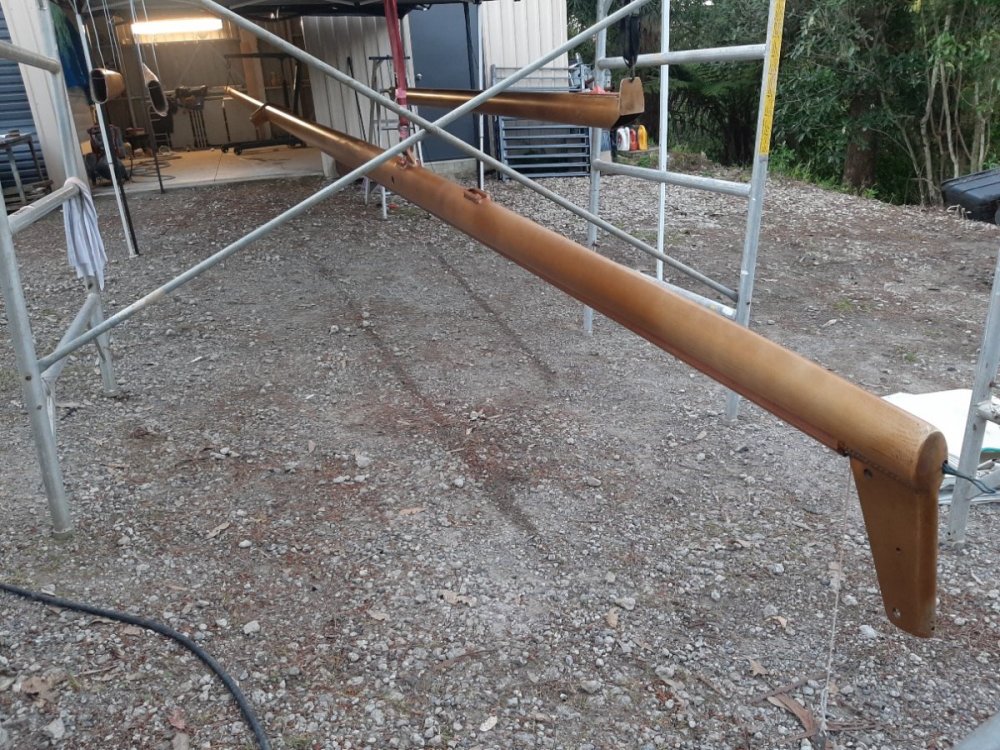
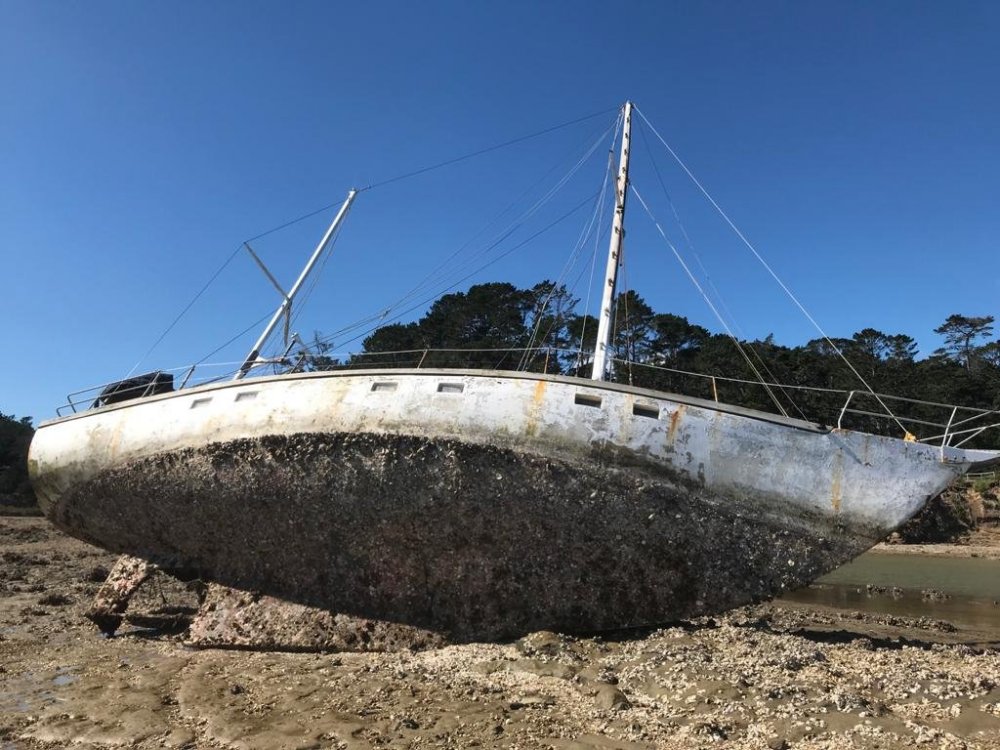
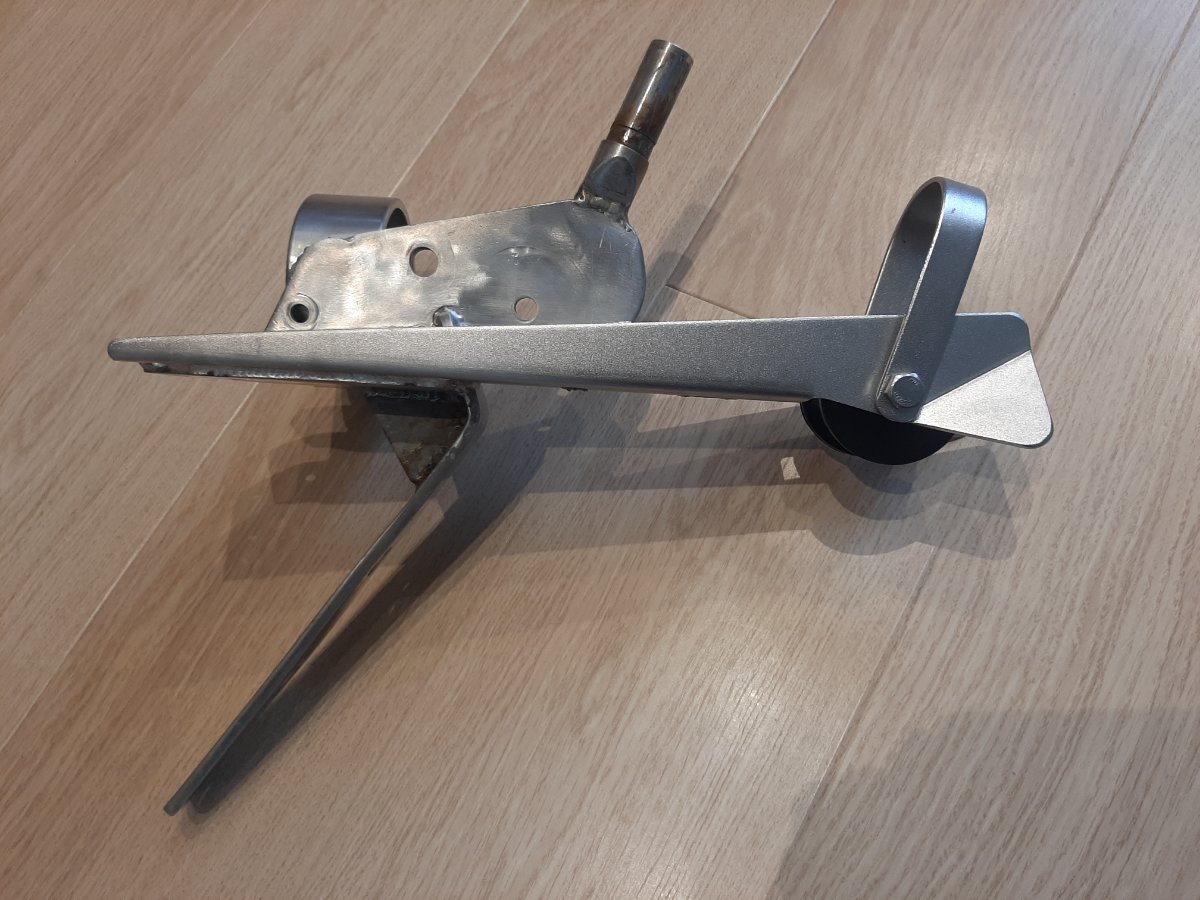
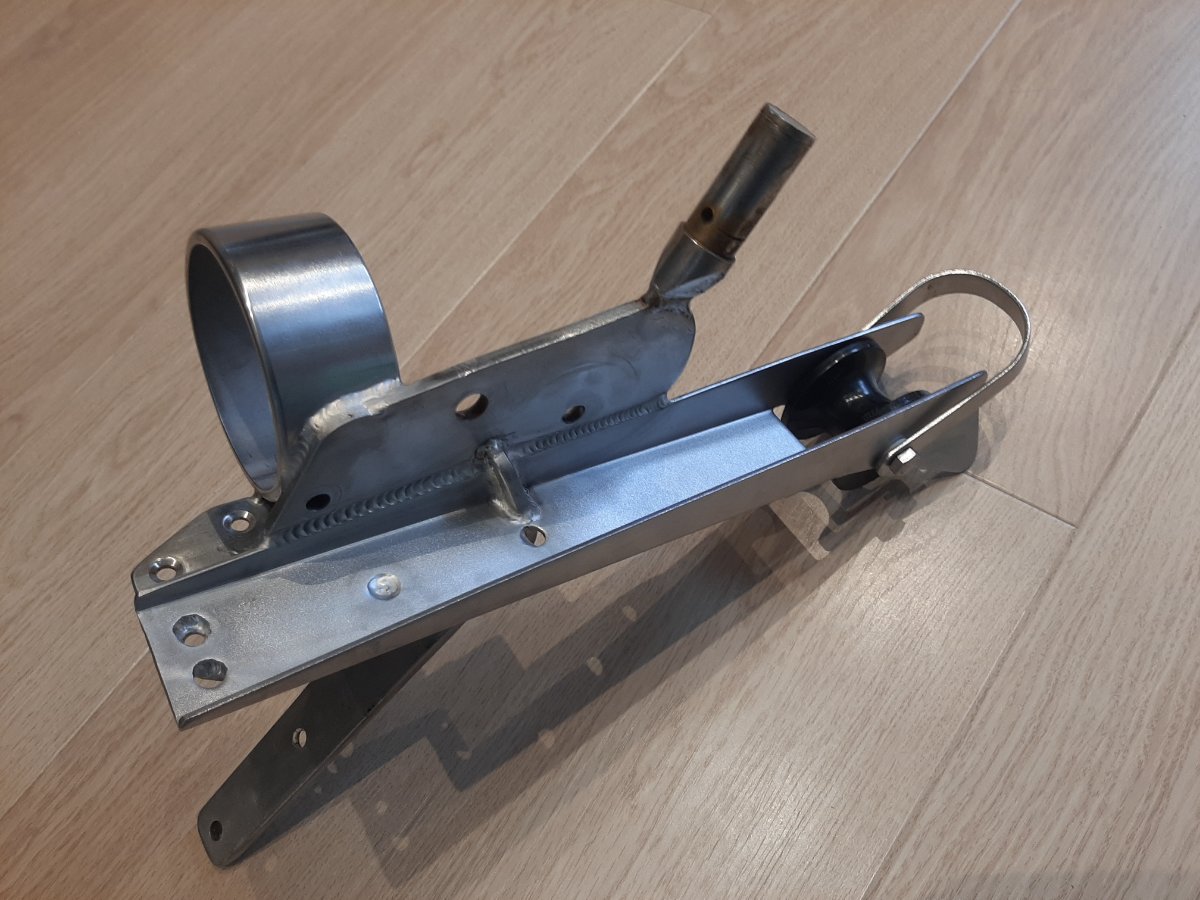
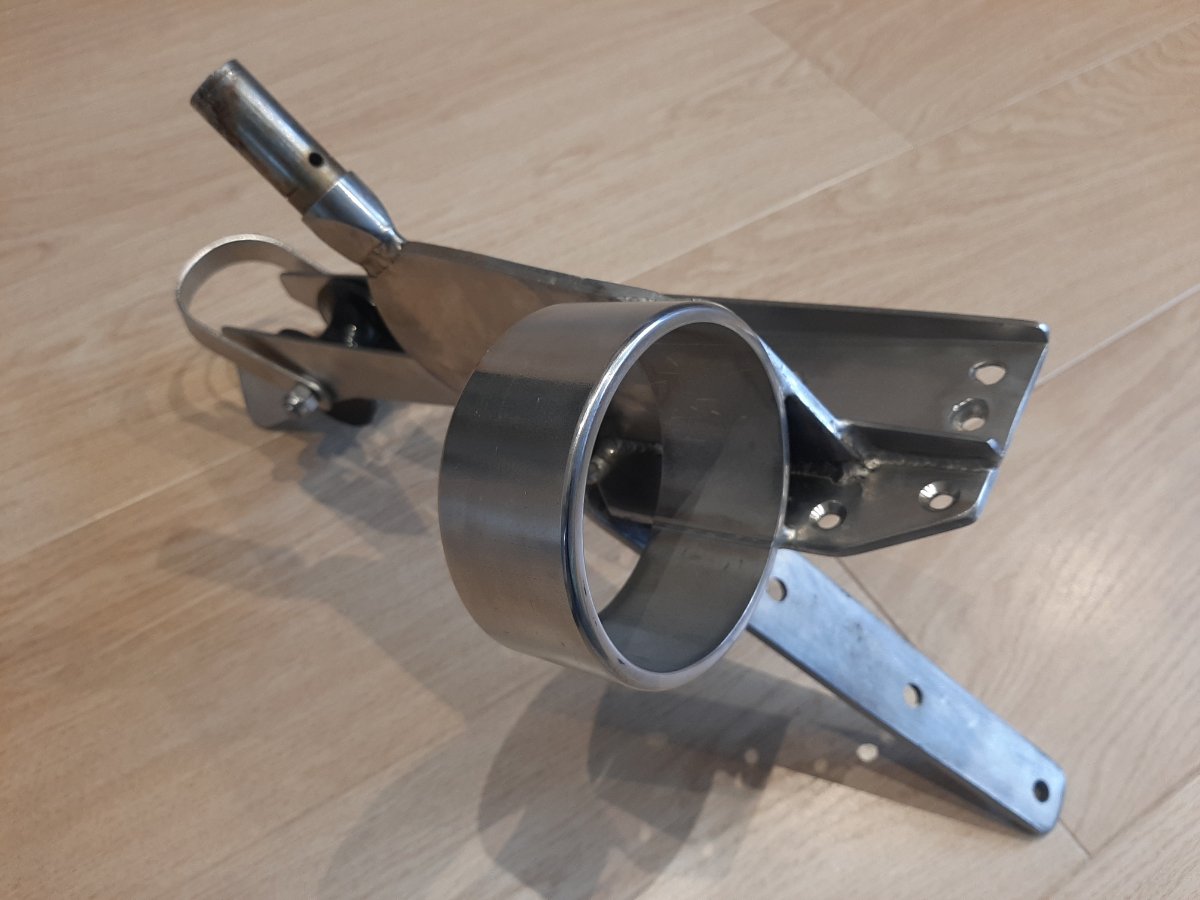
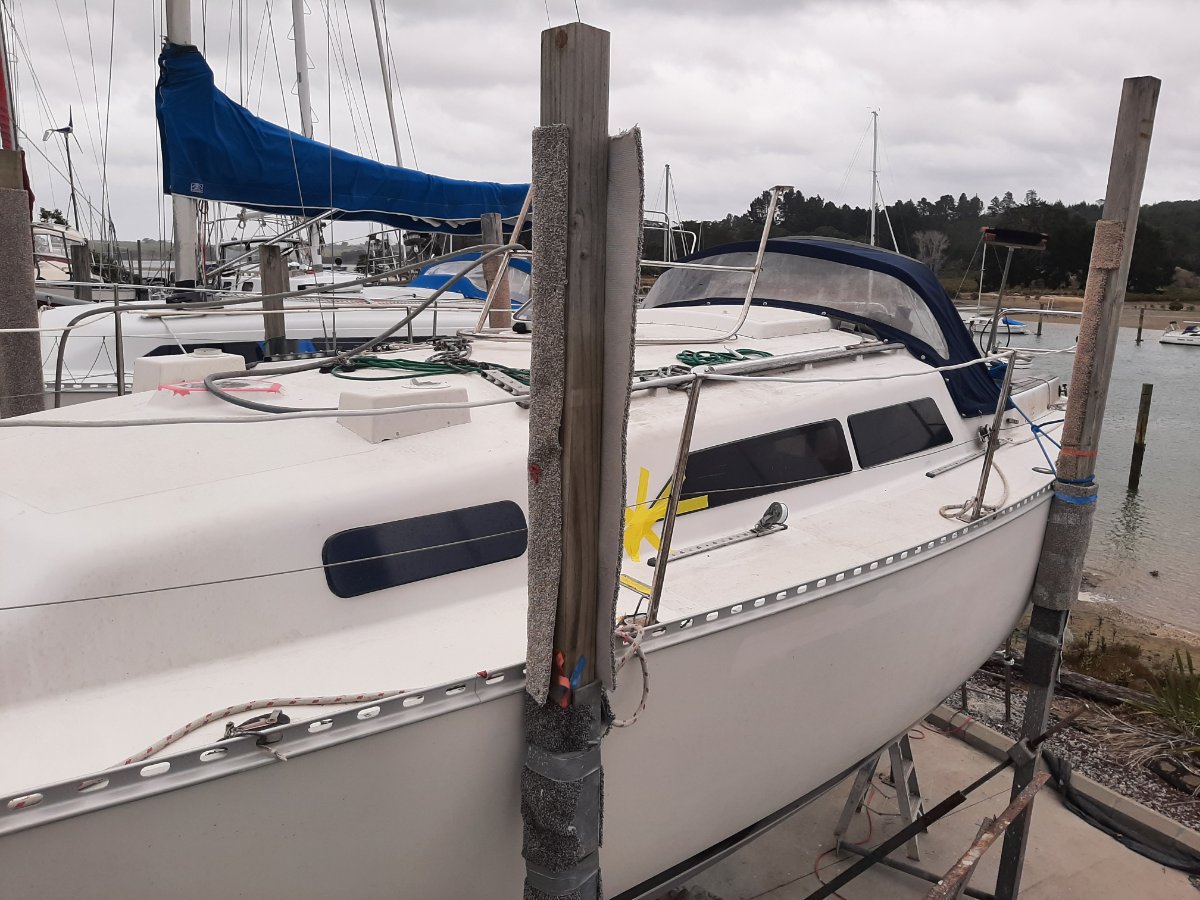
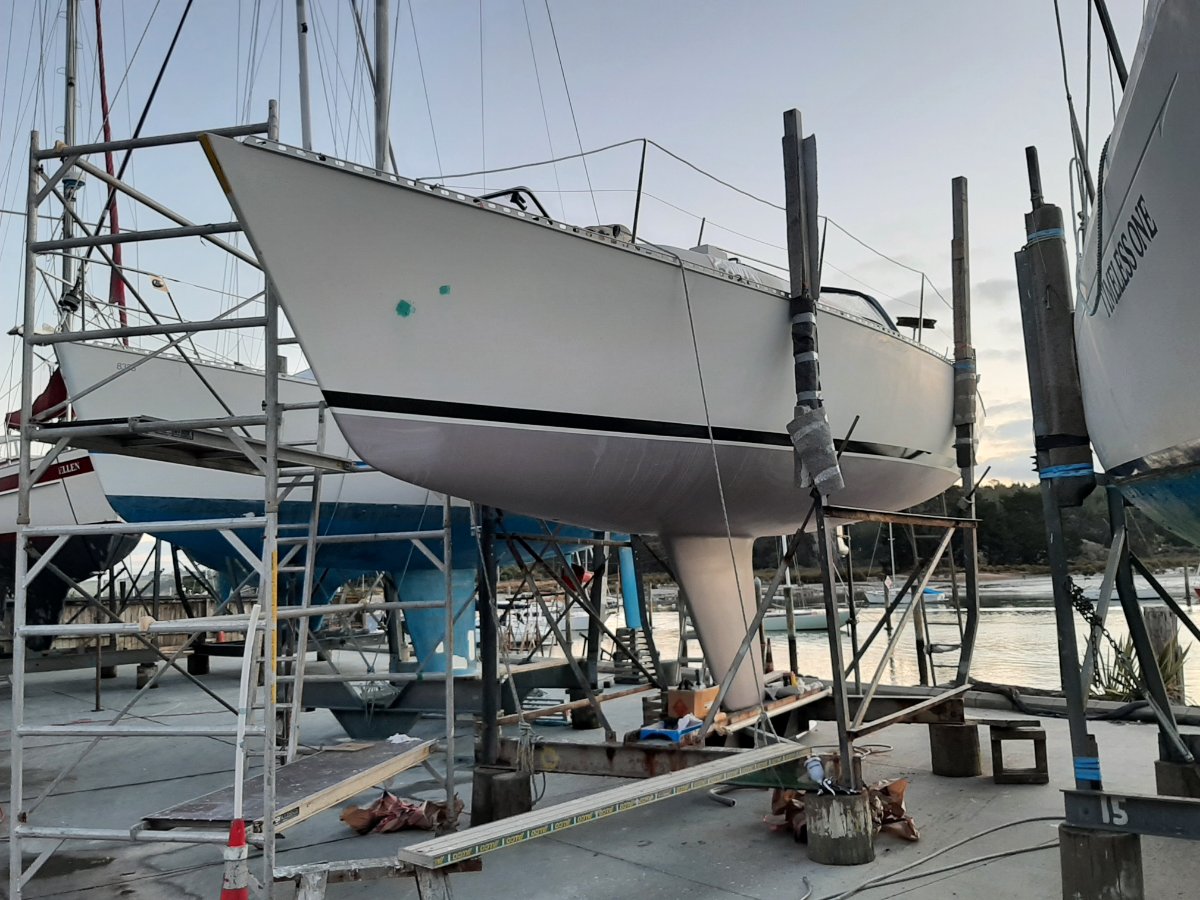
Really aiming for simplicity and least modifications to a class boat possible.
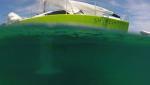
Had a deck mounted one on the 930 and had to remove anchor locker lid to use it whilst cruising but the 1020 split lid makes it a lot more practical. Prod will be removable with a single thumb turn screw at the back then just slips backwards out of the stem ring. While viat out of the water I'm adding a Bob stay tube to the knuckle but a heavy enough section prod can survive without one. (We had 19.7kts in 35kts on the 930 and ran a zero pretty tight with no breakages). However the 1020 is a fair bit heavier!
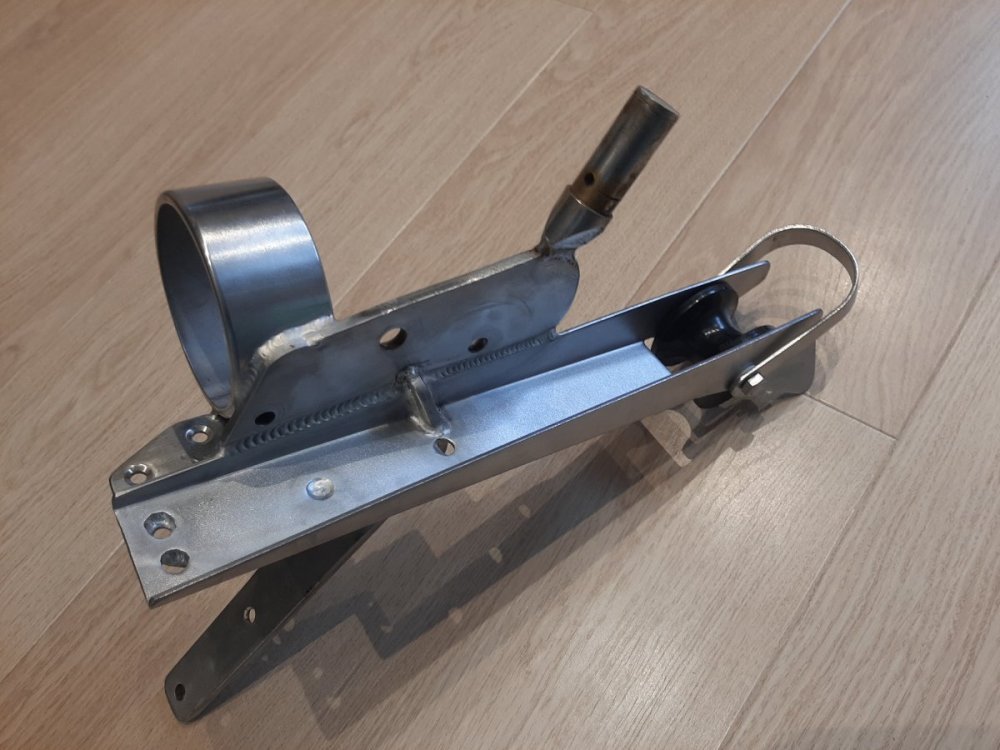
I've already modified the stem head fitting to take prod and keep anchor off stem.
Whilst anchor locker out and new bulkhead being made I'll engineer a bit of compression resistance into the rear end.
This really is just a cruiser setup! Hate poles and rolls with kids and wives.


-
 1
1
-
 2
2
-
-
Keen!
-
It's for a deck mounted prod, so I could build it up where it slips through the ring. Most likely unstayed so 3.5mm may be a bit on the thin side? Can't recall the thickness of the one on my 930 but it was pretty beefy. What kind of length is it?
-
20 hours ago, Bad Kitty said:
Kilwell in Rotorua?
Yeah got my last one from there. Just checking to see if a crew.orger had something kicking about
-
21 hours ago, 44forty said:
Go on …be the first 1020 with a prod !
sorry I don’t have a piece of section though
Why would I want a prod on a 1020?
Gennakers are just so hard to deal with on a family cruiser, there's all that pole carrying and clipping/unclipping, uphauls, downhauls, tweakers, wine glasses, death rolls and Chinese gybes.... oh wait... that's Spinnakers 😅
-
 1
1
-
-
As description
Need thick wall carbon mast/prod section parallel.
2-3 metres would be good!
Cheers 022 044 9171
-
After 3 terms of Labor with their "No overnighting on boats" policy, the bottom really fell out of the yacht market
-
1
-
1
-
-
Yes I did clean the run up and no I don't know why last pic upside down 🤣
-
-
Today
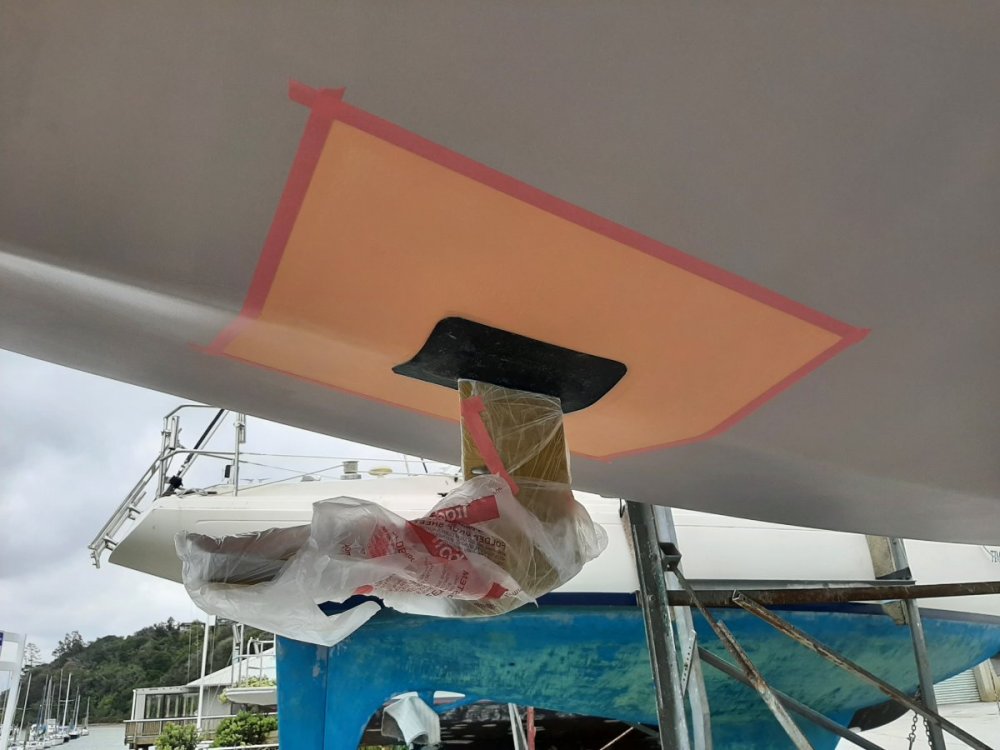
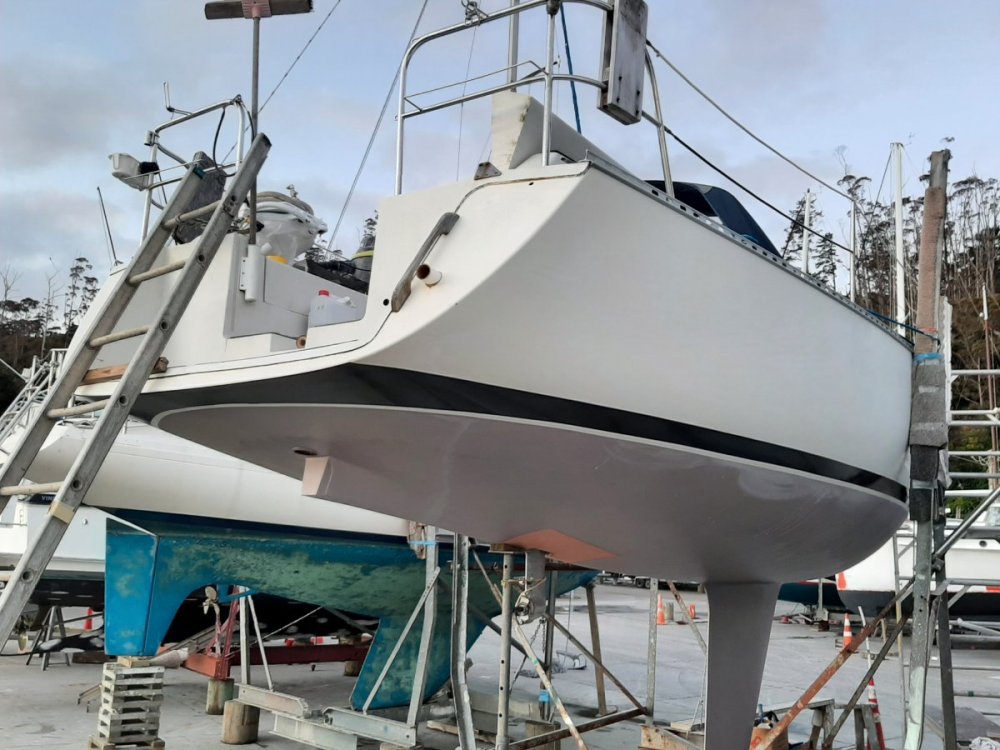
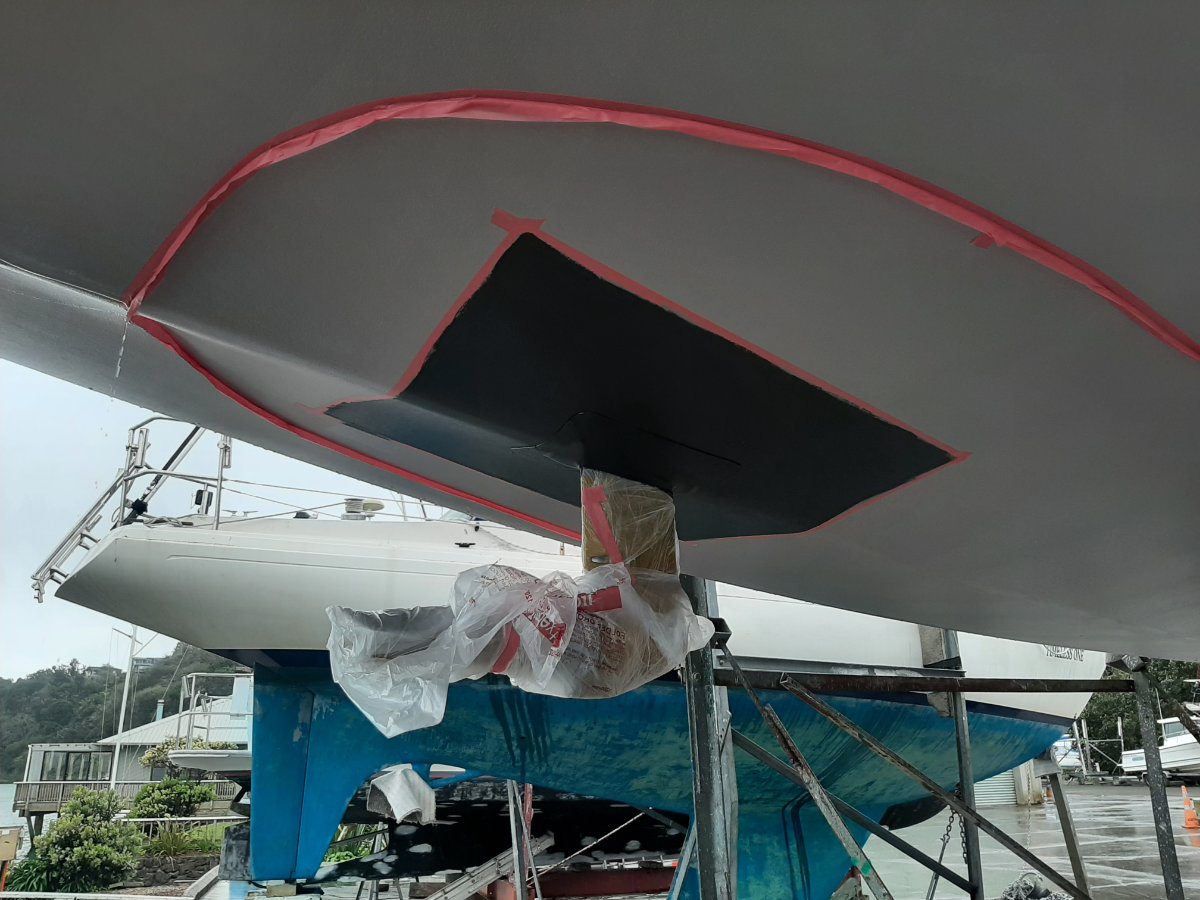
Installed sail drive boot, epoxy primed and applied first coat of Antifoul.
2nd coated internal window trims, installed windows just in time to weatherproof boat for the forecasted rain!
Windows a hard job solo in a breeze


-
2
-
-
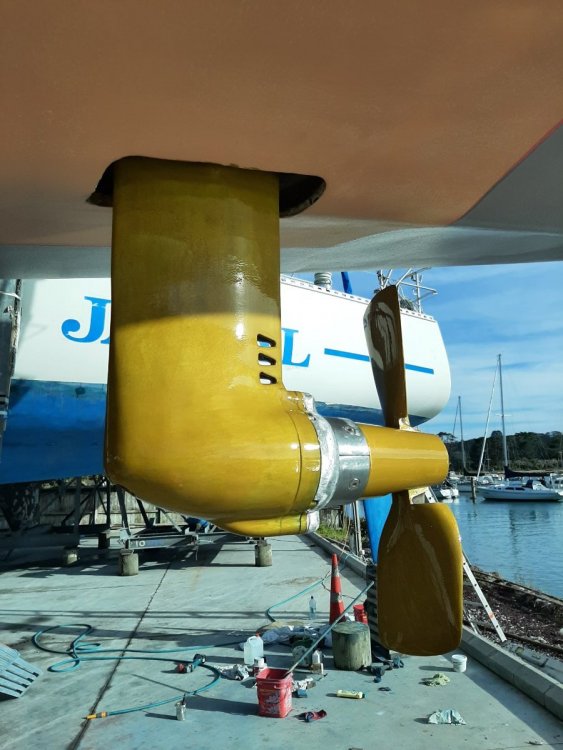
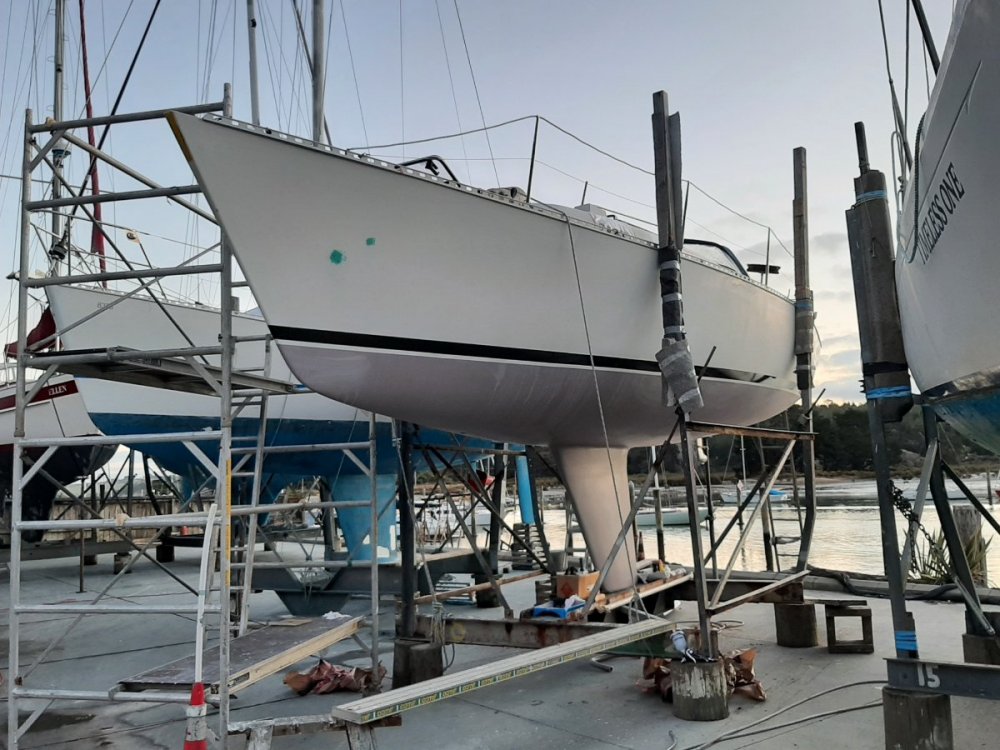
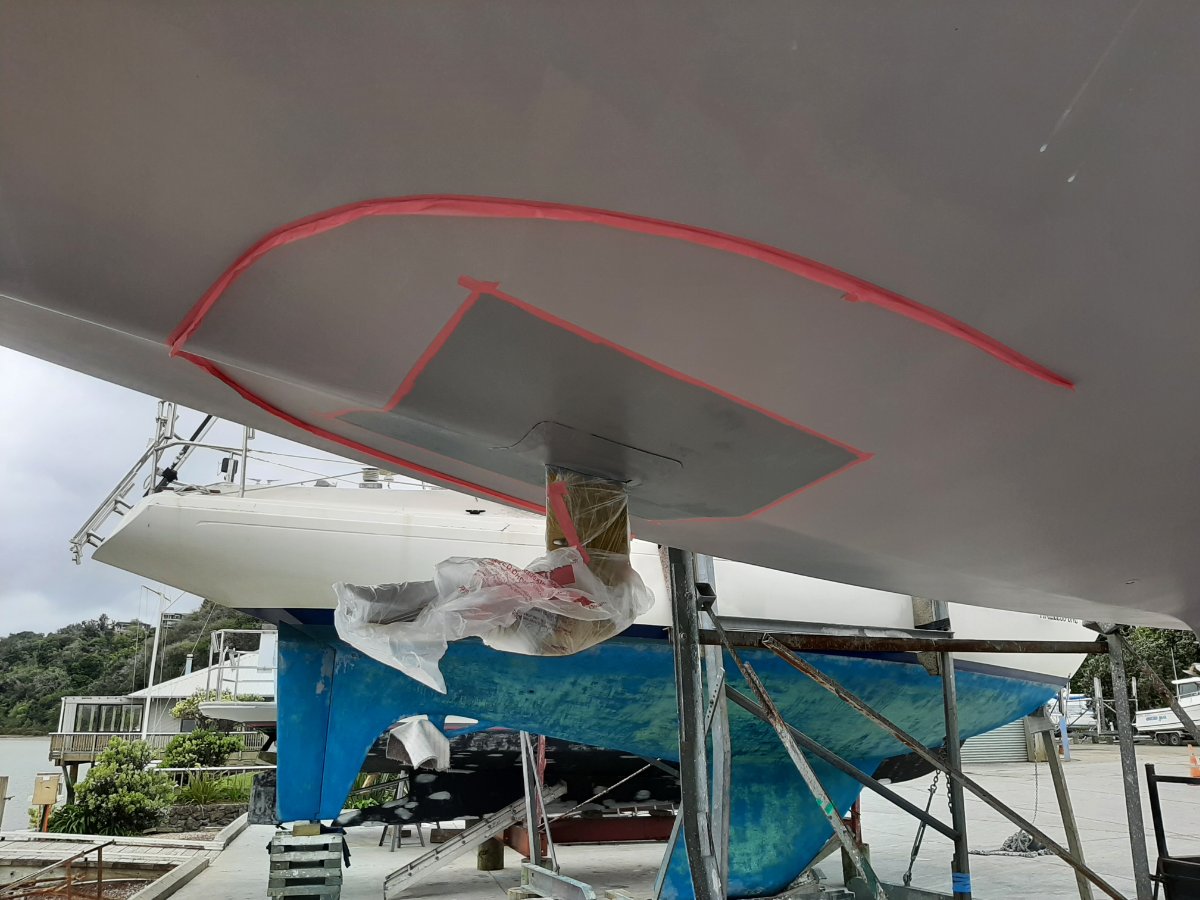
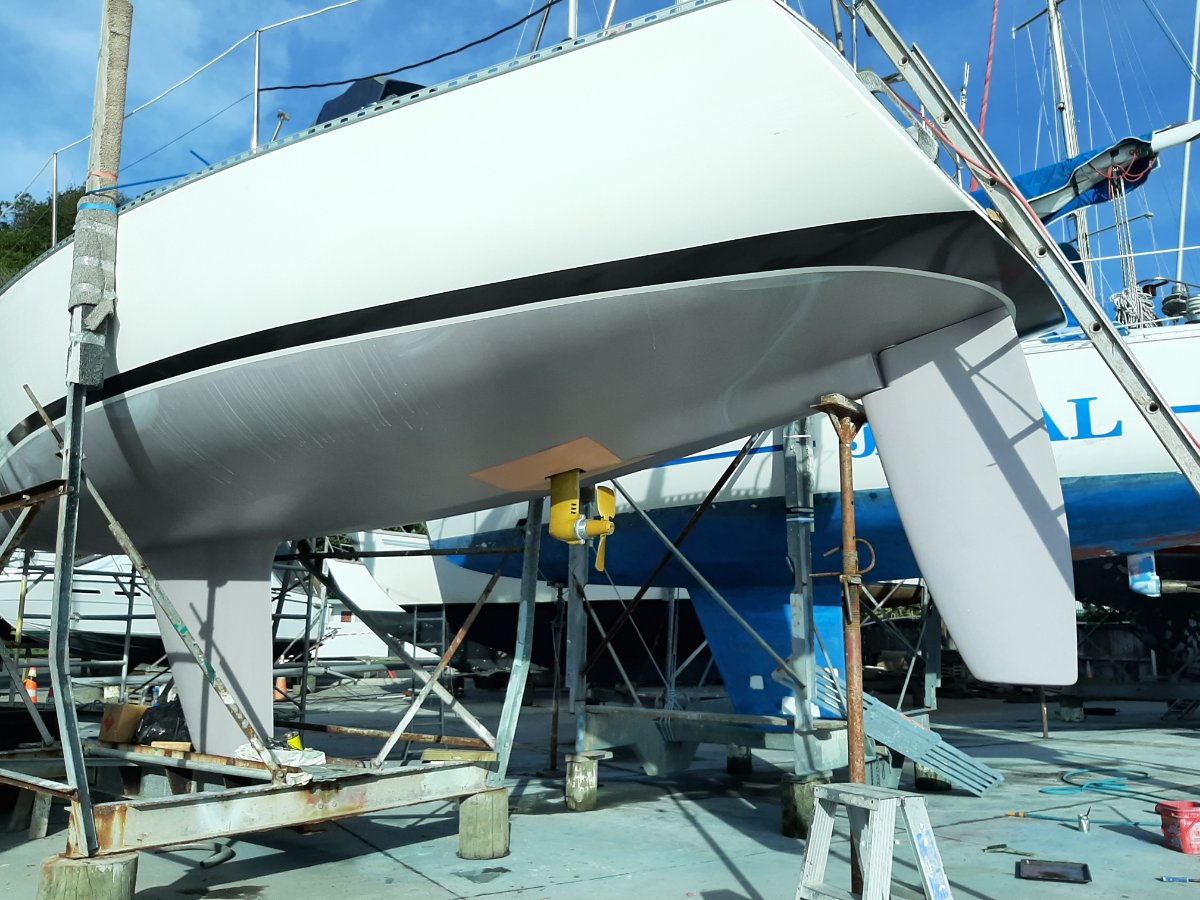
Friday afternoon/Saturday ... Painted new charcoal metallic boot top above my laboriously reclaimed white gelcoat factory stripe. Re drilled bolts for rudder top gudgeon, removed, freed up and reinstalled grease gland packers for bearings. Fitted rudder bearing tube and rudder. No play now!
Installed new prop and prop speeded sail drive and prop. Wife and kids masked and sanded teak interior window trims.
I prepped external window surrounds and installed vhb tape, and marked and masked window outlines.

-
1
-
-
1 minute ago, Jon said:
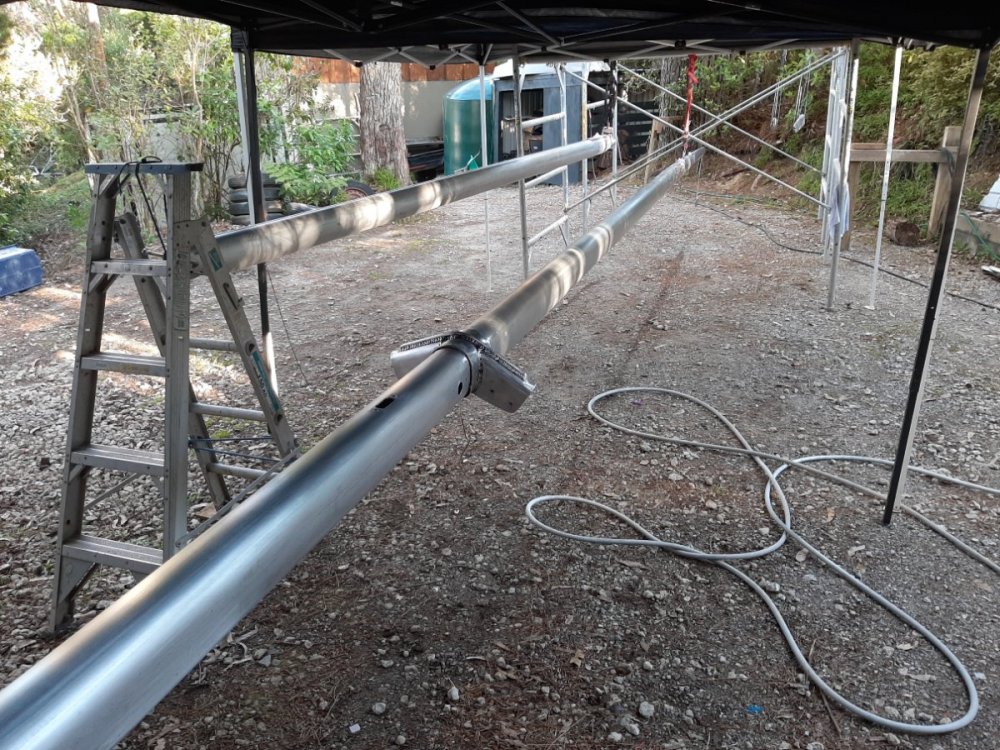
Nice carbon rig mate
I wish 😉
Can you imagine the anguish that would cause in the Owners association!
I'm probably already in trouble for changing the back stay to Dyneema...
-
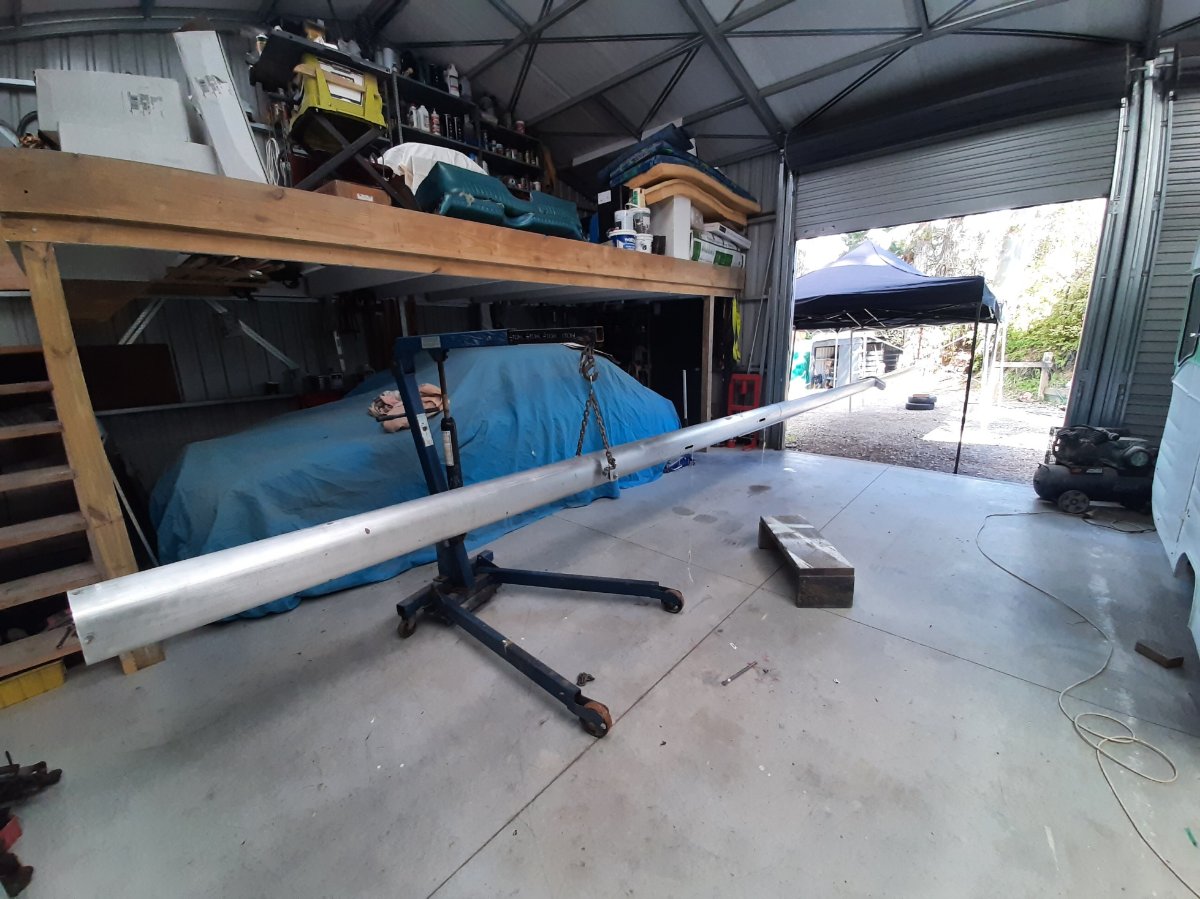
Was transported a shortish distance from yacht club to my house up a twisty road utilizing a Nissan Navara with a Hydraulic transmission lifter lashed on the tray, Borrowed digger trailer with an engine lifting crane bolted to the back end, motorcycle tie downs, carpet off cuts, a not insignificant amount of overhang, a firm belief in luck and no plausible Level 4 get out of jail story....
Middle coat is Resene 81a Etch Primer.
Full System was:
Linbide/orbital/ Hand Sand old coatings off.
Detergent/waterblast extrusion.
Allow to dry.
Tramline Sand with 180g paper top to bottom.
Air Dust, then clean whole thing with Wax and Grease remover, changing to clean rags regularly.
Mix 81a and B etch primer and catalyst and allow to stand for 20 mins induction time, meanwhile:
Apply Hydrafos Acid/Water Mix (2:1) with garden weed sprayer, allow to fizz but not dry out, wipe with clean damp rags then dry with paper towels until they come clean.
Wax and Grease remove again, wiping with clean rags as you go (think Mr Miyagi Wax on/off here)
Spray 1 Wash Coat of etch primer.
Allow to dry overnight.
Then apply chosen top coat - in this instance Resene Durepox Black 1st coat thinned 20% followed 10 mins later by the same but with 10% clear added for a bit more sheen and a serviceable finish.
A LOT of work but considering the worn and beaten to sh*t original Metallic Grey Caprathane that was on it from New I had no real other option but to paint.
Quietly stoked with how it's come up 😎
-
2
-
-
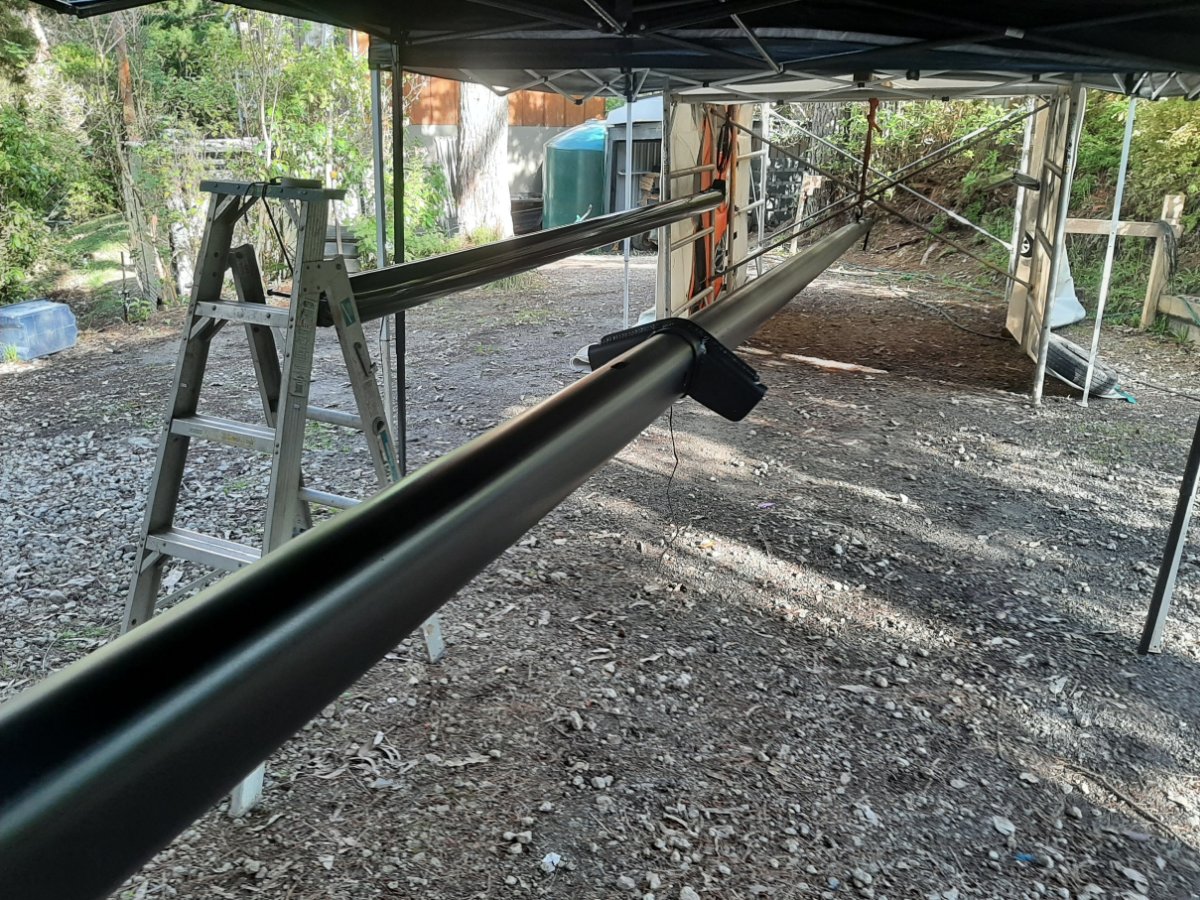
Also built a covid testing centre at home and painted a mast in it.
35 years old and she still scrubs up ok 😉


-
2
-
-
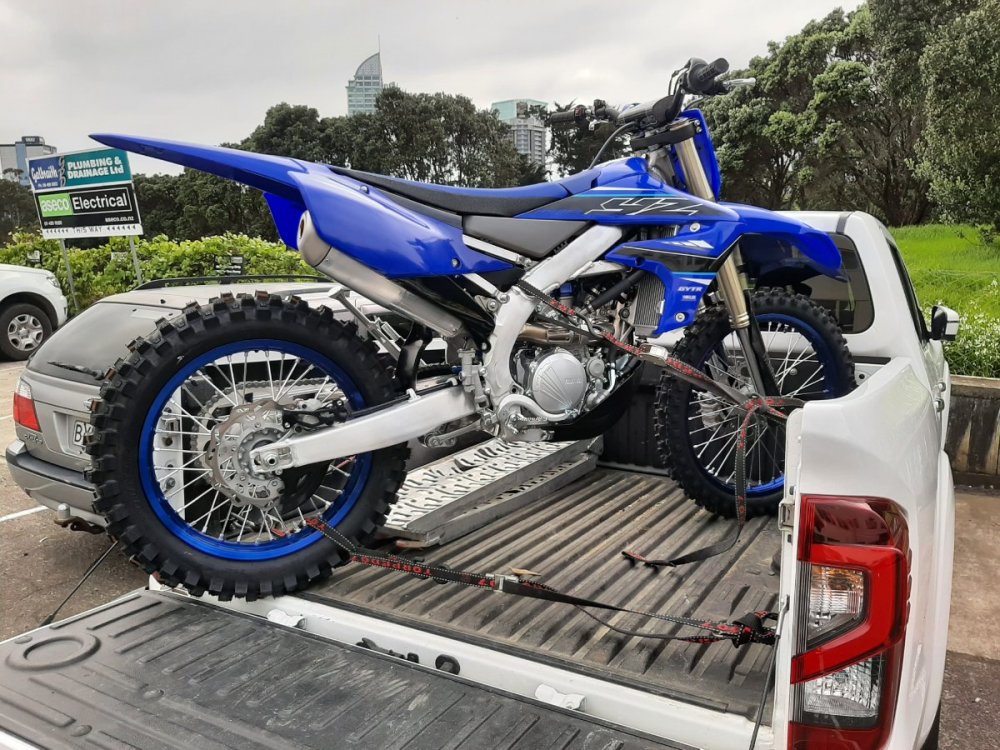
Bought another toy that I'm not allowed to use. Pushing the boundaries of 'Click and Collect'
-
1
-
1
-
-
12 hours ago, waikiore said:
Dont sand your Gori, just wipe with the solvent and Propspeed from new either way works.
1 hour ago, nath said:Gori or not, I have seen a bunch of people claim that they shouldn't coat their new bronze props for x months when new. There's no science behind this; we choose the variations of bronze for our propellers because of how close to inert bronze alloys are in a corrosive environment. When coated with propspeed or other silicone products it will have the best chance of staying in it's zen-like state without material loss. While yes, an uncoated prop will have migration of some alloy components to the outside, this isn't beneficial in yellow metal.
Awesome, thanks guys. I couldn't see the reasoning in marring a near perfect surface to try and make it more slippery.
Past 4 boats all I've had to do is tilt the outboard and corrosion-be-gone!
-
12 hours ago, waikiore said:
-hope you got a good deal on the Gori.
5 hours ago, Jono G said:The cheap boat costs are adding up.
Why the Gori over say a 3 bladed Volvo prop?
Ex owner of boat purchased a new Gori to replace the one lost between me viewing the boat and paying for it.
-
My Sail drive is coated in prospeed that is still in good nick.
Fitting a new Gori folder in the next couple of weeks and have been told by more than one passer by that I should run it without anything on it for a season or so before sanding/applying any protective coating to it. I'm an inboard newbie so green as they come in this field... is there science behind this approach or should I take the sail drive back to bare metal and apply the Propspeed system to the whole lot?
Seems sacrilege to sand the new prop 🤣
While I'm on it, exactly how far out from the sail drive should you apply non copper based AF?
Thanks
-
Does Nikki know you caught a portion of her butt in that pic?
I know I'd be lynched if I did that 😅
-
1
-
-
15 minutes ago, Island Time said:
Good Job!
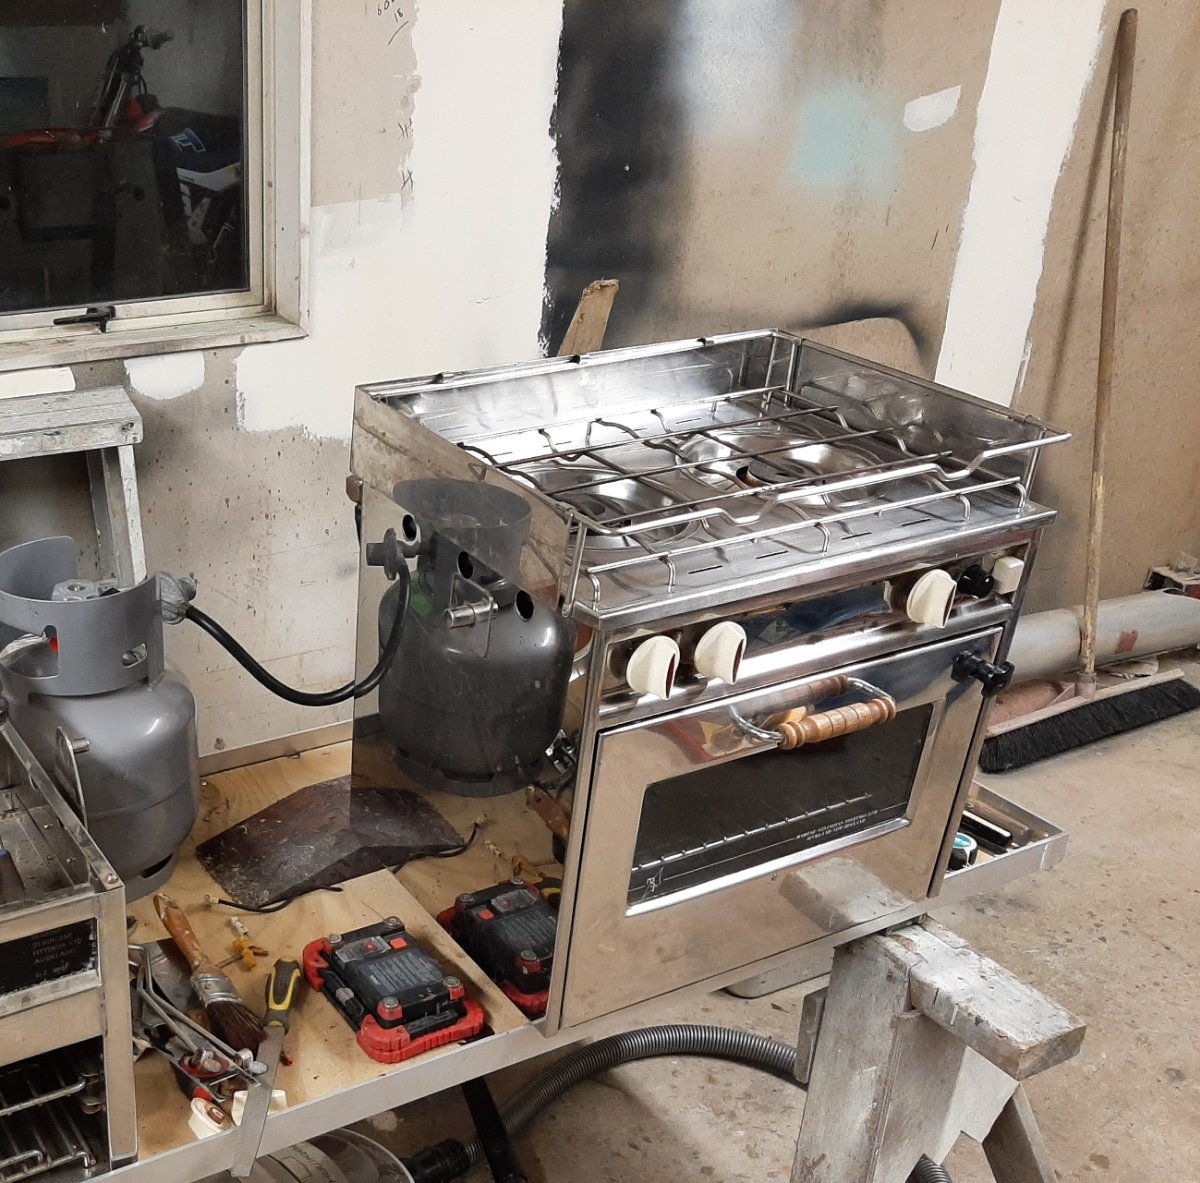
I've not seen a 2 burner with oven and grill before. Is it the model with or without the thermocouple flame out protection? I thought they all had that, until I saw a neighbor's one - three burner with oven - that didn't.. I still use mine, recently replaced a couple of the thermocouples to keep it working 100%. I would have thought any sign writer with a computer could make you a new label?
Yes has thermocouple flame outs on all elements.
The main oven element flutters for approx 30 secs or so once knob and pilot light switched off, then there's a distinct 'click and she's out.
I was wondering if normal sign writing vinyl would handle the heat.
The panel is thin stainless that was originally spot welded on the edge of the holes for control knobs but half the welds had let go and it was bent. I removed and cleaned it all up and will just rivet it back on when I've sussed the decoration of it.
-
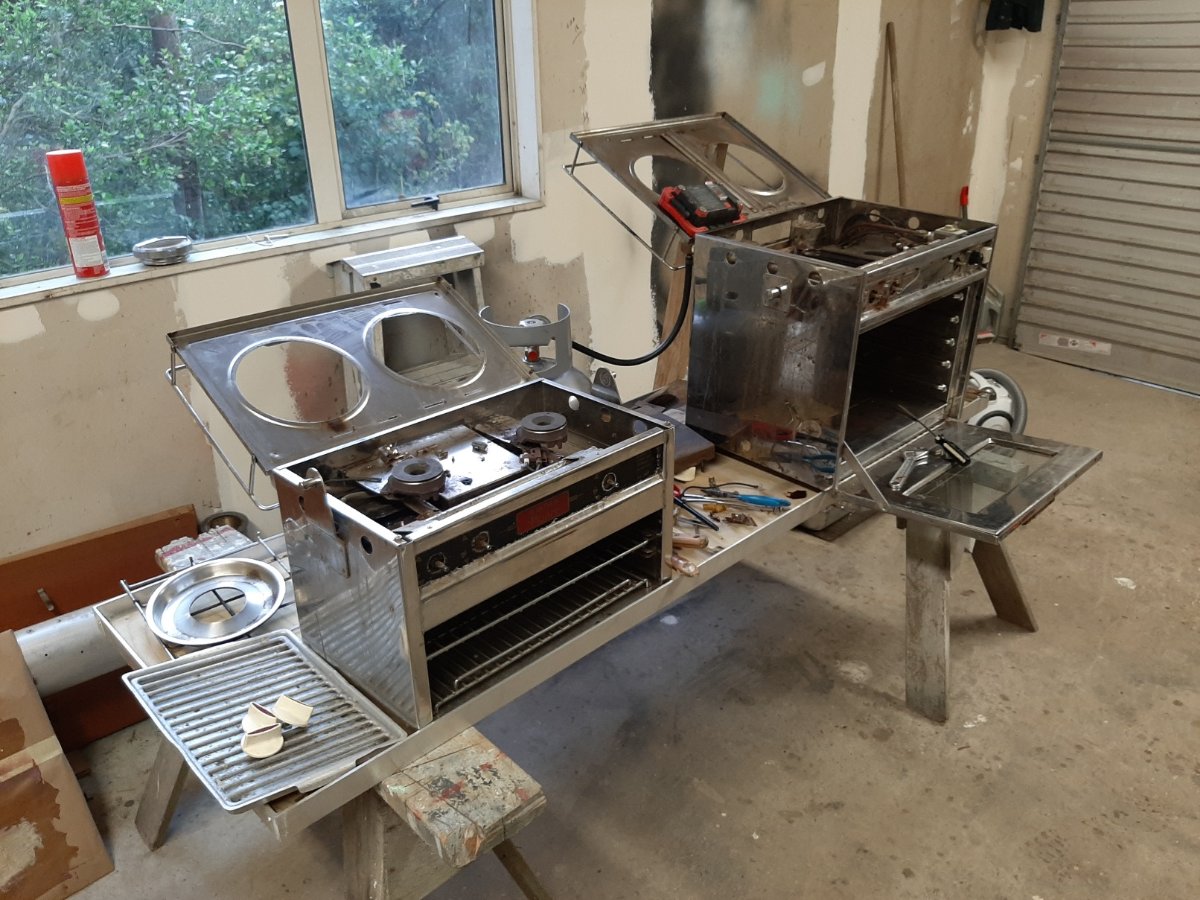
The 1020 came with a functioning Mariner Prince 2 burner with grill but the boss requires an oven.
So managed to get my hands on a mostly functioning Princess oven from trademe a few months back. Took some time over the weekend to fully strip the oven down and refurb/clean/reassemble with parts from the old unit. The thing cranks now and all elements fire up first click 👍🏽
Such a well built unit, compared to the crap available these days.
The only thing that I need to do is somehow get the front panel sticker recreated so we have the gradients etc.


-
1
-
-
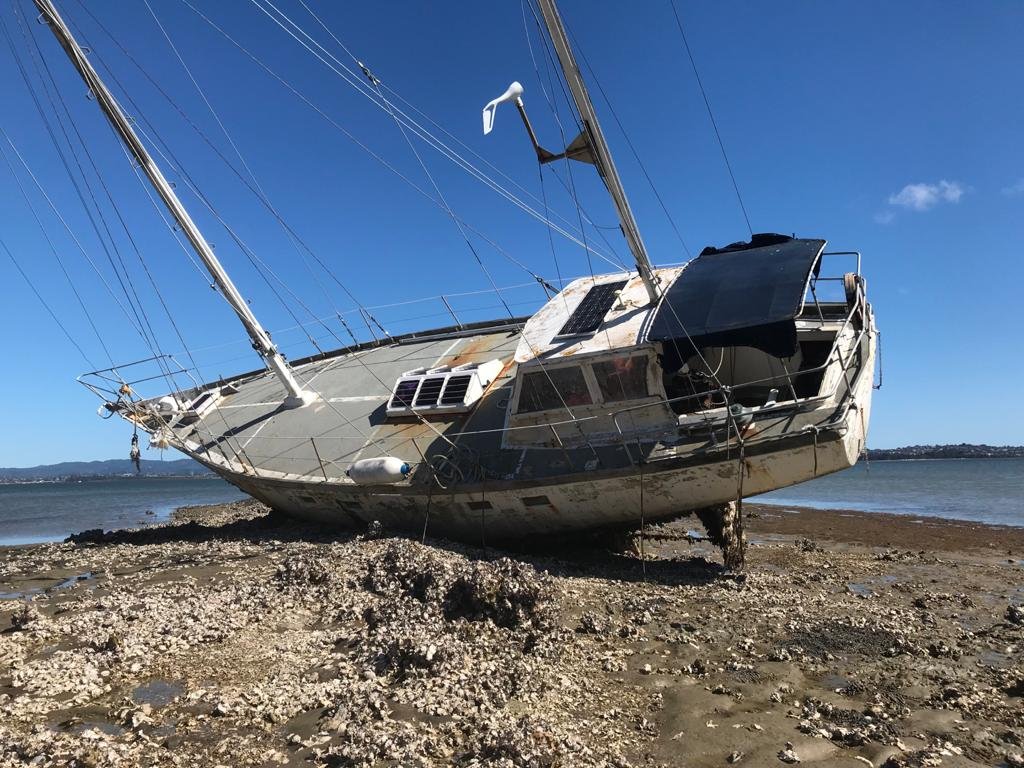
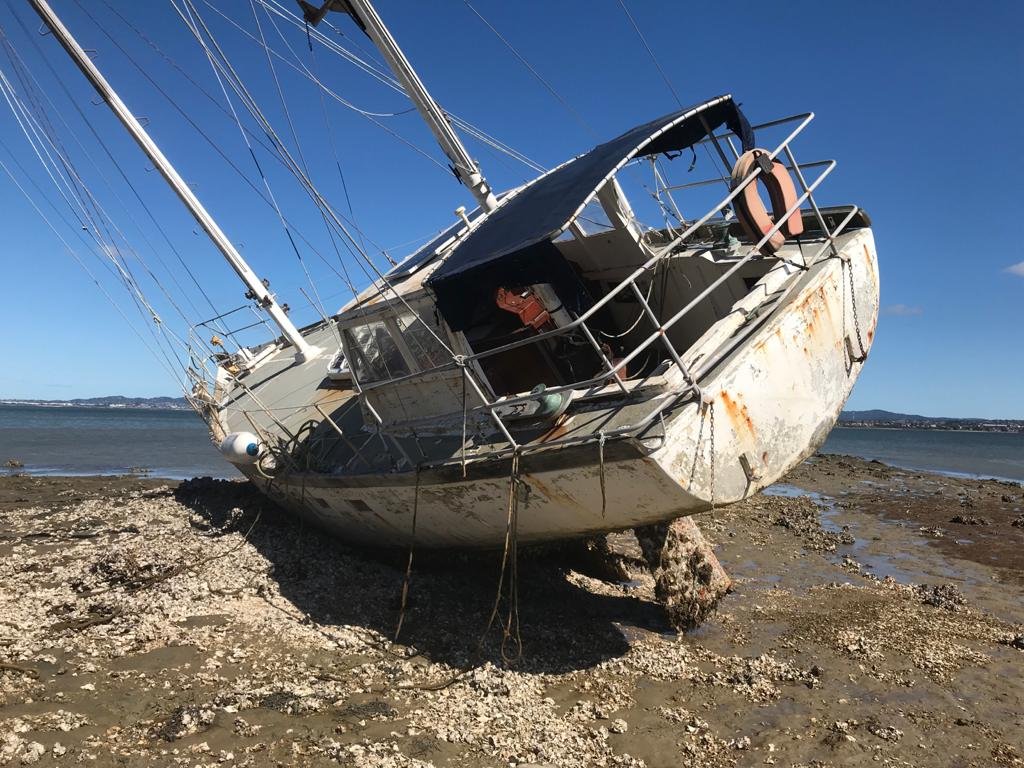
On 6/09/2021 at 11:29 AM, Psyche said:


I took 3 photos
This looks suspiciously like my parents old ferro cement yacht 'Gryphon'.
Would you say she was about 48 ft?
Whereabouts did you snap her?
-
On 3/09/2021 at 11:08 AM, CarpeDiem said:
Are they the same as what comes with the DST800?
If so I have one.
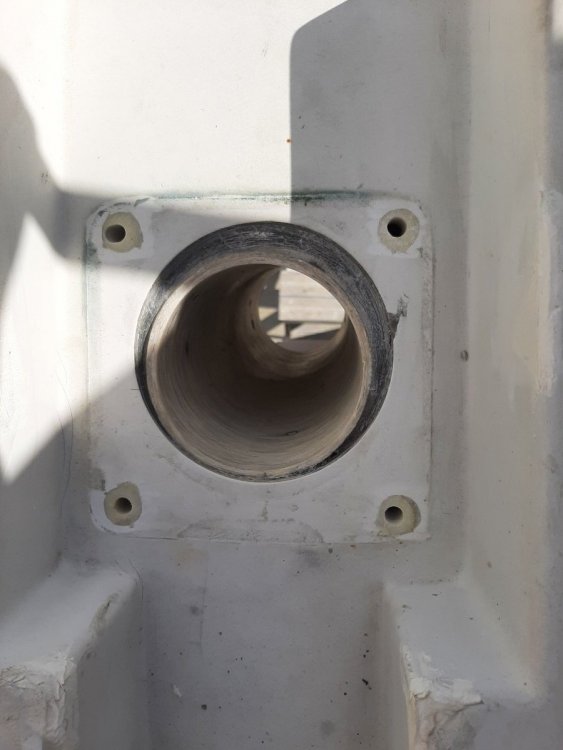
I'll have a look at the blanking plug when I go down to empty the dehumidifier/bucket out the forepeak from some idiot cutting anchor locker out just before lockdown 😅
-
Yes, have had a hunt around on the web. I've seen those guys and a few other offshore places that can supply, was just hoping to be able to support local...
.jpg.92ce77951566bd2b7521d33864eebe7d.jpg)


Motorbikes
in Everything Else
Posted
He saved that one but trowled it in final laps of the session. Nothing trickier than a slowly drying track when your searching for those last 100ths of a second!
If you look at the replay of MM crash you see Jack Miller loses the front in the same spot but saves it on his knee.